Friday, December 21, 2012

Christmas Stocking Card

Good Evening to you all!

I've been so busy decorating, shopping, wrapping gifts, planning Christmas meals, playing Dragon Vale (oh I know that doesn't have anything to do with Christmas but it is so much fun to play) and browsing through Pinterest for Christmas ideas, that I haven't had much time for crafting...

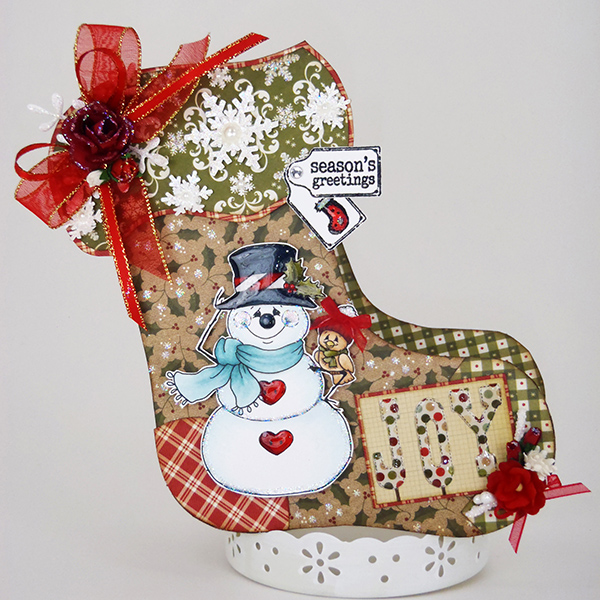
I had originally planned on making Christmas Cards for family and friends this year too, but well... I've run out of time so maybe next year hahaha.  I did however find some time today to finish a little Christmas Stocking Card that I will save for next year.  I was inspired by a card my mother sent us.  It had the cutest Christmas stocking on the front of it.  I had bought some cut out stockings, which were just the right size; at our local Michael's Craft Store awhile back so I used one as a stencil for cutting out my card.  I cut a heal and toe piece and a cuff for the top of the stocking.  I also cut out a bunch of snowflakes and covered them with Star Dust Stickles to make them shine.  I layered large and small snowflakes together, added a pearl to the middle and attached them to the stocking cuff.  The cuff paper already had snowflakes on it so I just added the ones I made onto those.  The Joy tag is a pre-printed tag from the 6x6 paper pack I used.  I don't know if you can tell or not, but I added Glossy Accents to the letters to make them stand out.  I haven't put anything on the inside of my card yet, I'll probably wait to do that until I know who I will be giving it to.

Soooooo here it is...enjoy!
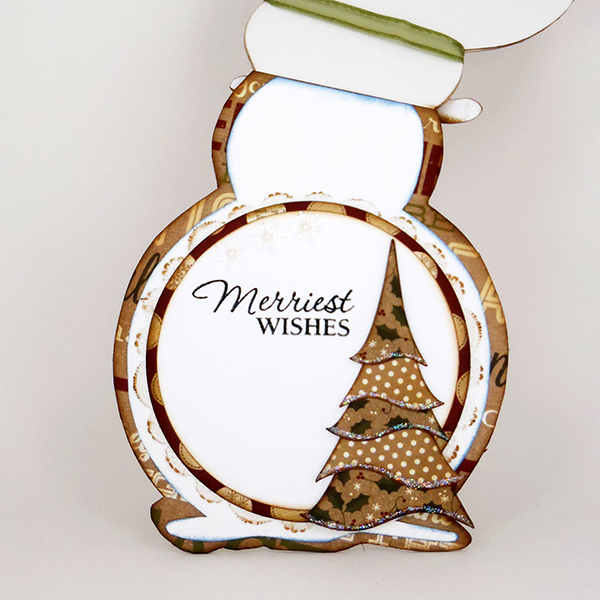
Front

Peek of Inside

My Card Recipe:
     Digital - Snowman Top O'The Mornin by Whimsy Stamps
     Stamps - Christmas Mini Icon Tags & Christmas Sentiment Tags by Lily of the Valley
     Paper - Bazzill White & Handmade Holiday 6x6 paper pad by simple Stories
     Flowers - Wild Orchid Crafts
     Paper Punches - Alpine & Aspen Snowflakes by Martha Stewart
     Metal Die - Snowflake by DooHickey
     Inked Edges - Distress Ink Vintage Photo
     Sparkle & Shine - Stickles Star Dust and Glossy Accents by Inkssentials
     My Stash - Ribbon & Pearls

Colored in Copics:  Snowman BG0000, C00     Cheeks RV0000, RV00     Top Hat C5, C7, C9
Blue BG18 + 0 Blender     Red R24, R27, R39     Brown Bird E30, E31, E33    
Yellow Beak Y21, YR24     Green YG93, YG95, YG97     Grey Shading C00


Thanks for stopping by...
 
Hugs...


Tuesday, December 11, 2012

Winter and a Snowman

Good Afternoon!

Today I have a christmas card I finished  using a Saturated Canary Digital called Winter.  I thought I was going to send hand made Christmas Cards this year but...I have almost run out of time so probably will send out store bought cards instead.   :0(  

I've seen so many other diy crafts I want to work on so my card making is way behind...I am going to continue making Christmas Cards as time allows and will post them as they are done.  I'll keep them all for next year and hopefully by then I will have enough made to send to everyone on my Christmas Card List!!! 

So here is my card for today, hope you like it!

Front
Inside


My Card Recipe:

     Digital - Winter by Saturated Canary
     Stamps - Merry Wishes by Verve Stamps and Christmas Sentiment Tags & Christmas Mini Icon
          Tags by Lily of the Valley
     Paper - Bazzill White & Red, Festive 6x6 Paper Pack by Authentique
     Flowers - Wild Orchid Crafts
     Paper Punches - Ribbon Loop by Martha Stewart
     Metal Die - Card Shape is Frilly Square #10 by Go Kreate, Leaf Branch by CC Designs and
          Snowflake by DooHickey
     Inked Edges - Distress Ink Vintage Photo
     Sparkle & Shine - Stickles Star Dust, Glossy Accents by Inkssentials and Ranger Liquid Pearls
          White Opal
     My Stash - Ribbon, Lace, Pearls

Colored in Copics:  Hair - E53, E35, E37     Face - E0000, E00, RV00, RV11     Eyes - BG0000
Red - R22, R24, R27     Green - YG03, G21     Yellow - Y32, YR21, YR24     Brown - E42, E43, E44
Snow - BG0000     Grey Outline - C00


Thanks for stopping by...
 
Hugs...


Tuesday, December 4, 2012

3D Snowman Card - Teddy with Penguin


Hi and Good Afternoon,

Today, as promised yesterday, I am posting my second 3D Card.  This one was a bit harder than the first because it required so many more 3D layers but I really like how it turned out.  I again used the Shape EZ Snowy Ball Card from Whimsy Stamps.  I love these Shape EZ Cards...I'm going to pop on over to there web site and buy some more!!! 

Here is my card for today...Enjoy,


Front
Side so you can see the 3D effect
Inside

My Card Recipe:

Card Template - Shape EZ Snowy Ball Card by TLC with Whimsy
Stamps - Teddy with Penguin & Christmas Sentiment Tags by Lily of the Valley and Very Merry
     Christmas by Hero Arts
Ink - Black Momento
Paper - Bazzill White and Handmade Holiday 6x6 Paper Pad by Simple Stories
Flowers - Wild Orchid Crafts and Petaloo
Paper Punches - Snowflakes are Martha Stewart Aspen, Artic and Glacial
Metal Die - Christmas Stacker Tree by Dees Distinctively A Cut Above, Spruce Sprig & Bon
Voyage Foliage & Vintage Leaf from DooHickey
Inked Edges - Distress Ink Vintage Photo & Stormy Sky
Sparkle & Shine - Stickles Star Dust and Glossy Accents by Inkssentials
My Stash - Ribbon, Doily and Pearls

Colored in Copics:     Bear - E30, E33, E35     Red - R24, R27, R37, R39
Grey - C4, C6, C8    Orange - Y17, Y39     Snow - B0000     White Shadow - C00, C2, 0 Blender

3D Instructions - By Mariska Van Der Veer found in the Whimsy Stamps Inspirations Magazine dated December 2011 - Issue 5.

3D Background Under Pieces is Copic W5
3D Pieces were outlined using Copic W10
3D Glue is made by OLBA and called Lijm Kit...I bought this from Whimsy Stamps


Thanks for stopping by...
Hugs...


Monday, December 3, 2012

Lighted Christmas Presents on My Porch

Hello again!  I have a second post to share with you today...

I really love to decorate for Christmas so I wanted to show you the new front porch decorations that I recently finished putting together.  I saw something similar on Pinterest and had to have it.

I LOVE PINTEREST!!!

Anyway...I purchased a set of lighted presents from Bed Bath and Beyond (using my 20% off coupon of course).  Then I removed the existing ribbon and bows, which were quite ugly, so I could add my own.  First I rewrapped new ribbon around each present.  Then I wired together some red and white Christmas flowers, and a green pine & pine cone sprig that I purchased from Michaels Craft Store.  I made three different sizes, (small w/1 flower, medium w/2 flowers and large w/3flowers) one for each present.  Then added red and gold ribbon bows, that I made, to each of the flower/sprig bouquets and placed one on the top of each present.  The bouquets are removable for storage and the presents will stack inside each other to fit right back into their original box for storage after Christmas.

I also purchased the artificial tree behind them from BB&B (using another 20% off coupon...love those coupons lol).  It came with white lights and pine cones attached and it sits inside a dark brown urn shaped pot.  I added a few red ornaments from Target and this is how it all turned out!

What do you think?  I really love them! 

Front Porch Tree & Presents
 
Presents Only
 
A Close-up of Largest Present Topped with Bouquet
 
Thanks for stopping by...
 
See you tomorrow with another Snowman Card...
 
Hugs...


3D Snowman Card - Bundled Little Snowboy

Good Morning to all!

I have been very busy putting up all of my Christmas decorations this past week!  The house looks great, presents are wrapped and only a couple more gifts to buy...yeah!!!  Now that that's done I can continue on with my Christmas Projects.

I have a Christmas Card to show you today that I did a couple weeks ago.  It is my first try at 3D card making.  I saw some samples in the Whimsy Stamps Inspirations Magazine dated December 2011 by Mariska Van Der Veer.  She has some amazing stuff on her web site, sendingyoualittlesmile.blogspot.com/.  Check it out...such beautiful work! 

Anyway I made my card using the Shape EZ Snowy Ball Card by TLC at Whimsy stamps.  It turned out so cute that I made a second which I will post tomorrow!

Here's my first 3D Card...I really love it...hope you do too!


Front of Card
See the 3D Effect
Inside of Card


My Card Recipe:

     Card Template - Shape EZ Snowy Ball Card by TLC with Whimsy
     Stamps - Bundled Little Snowboy by Whimsy Stamps, Christmas Grungy Messages by LOTV
          and Giving & Receiving by Penny Black
     Ink - Black Momento
     Paper - Bazzill White and Handmade Holiday 6x6 Paper Pad by Simple Stories
     Flowers - Wild Orchid Crafts and Petaloo
     Paper Punches - Snowflakes are Martha Stewart Aspen, Artic and Glacial
     Metal Die - Christmas Stacker Tree by Dees Distinctively A Cut Above, Spruce Sprig & Bon
          Voyage Foliage from DooHickey
     Inked Edges - Distress Ink Vintage Photo & Stormy Sky
     Sparkle & Shine - Stickles Star Dust and Glossy Accents by Inkssentials
     My Stash - Ribbon, Doily and Pearls

Colored in Copics:     Snowman - BG70, BG72+0 Blender     Red - R24, R27, R37, R39
Green - YG91, YG93, YG95, YG97     Pink Cheeks - R00, R20     Orange Nose - Y39, YR04, YR07
Outline - C00     Brown - E31, E33, E35     Grey - C4, C6, C8

3D Instructions - By Mariska Van Der Veer found in the Whimsy Stamps Inspirations Magazine dated December 2011 - Issue 5.

     3D Background Under Pieces is Copic W5
     3D Pieces were outlined using Copic W10
     3D Glue is made by OLBA and called Lijm Kit...I bought this from Whimsy Stamps


Thanks for stopping by...
 
Hugs...